Start your self-hosted blog in 60 minutes (Part 2)
How to setup Netify-CMS for our self-hosted blog base on gatsby-starter-netlify-cms template

In the last article, we have gone though to bring up the blog site on Netlify. In this article, we will talk about how to config Netlify-CMS to manage the blog post like create, update, upload image etc.
Step 1 - Make sure point to the right branch
The idea of Netlify-CMS is to check-in all updates eg. contents, images to your site's git repository. Every commit will eventually trigger Netlify to build and deploy. Hence telling Netlify-CMS pointing to correct git branch is critical.
- Go to your GitHub account and check the branch name of your site e.g. by default it should be master
-
Go to your development environment and make sure the branch name == your site's git repo branch name (e.g. master) in the "static/admin/config.yml"
backend:
 name: git-gateway
 branch: master
 commit_messages:
   create: 'Create {{collection}} “{{slug}}”'
   update: 'Update {{collection}} “{{slug}}”'
   delete: 'Delete {{collection}} “{{slug}}”'
   uploadMedia: '[skip ci] Upload “{{path}}”'
   deleteMedia: '[skip ci] Delete “{{path}}”'
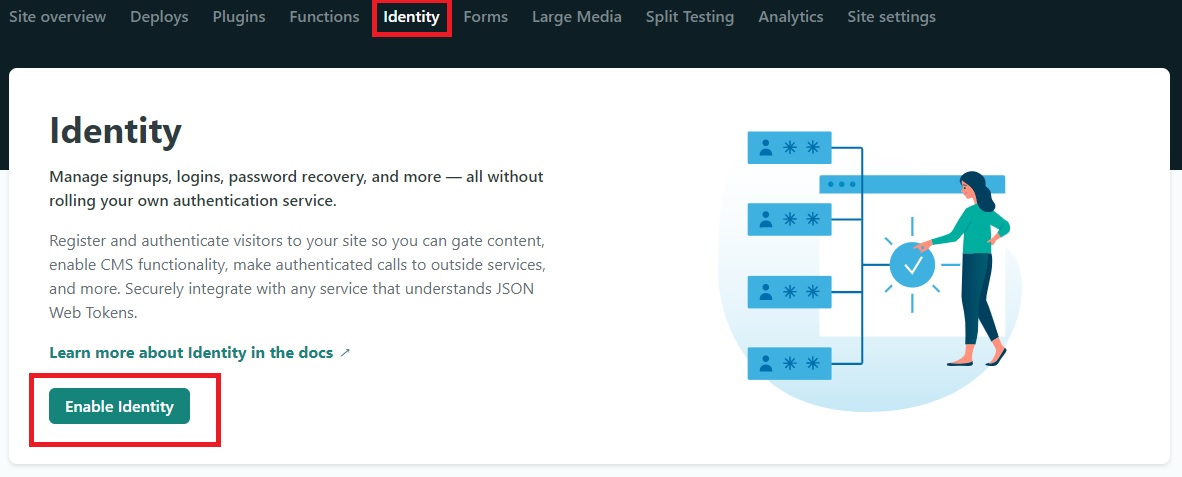
Step 2 - Enable Netlify Identity and Git Gateway
Go to your Netlify project / Identify and click "Enable Identify" and then click "Invite users". Enter your email address and you will receive invitation email shortly. Complete the registration.
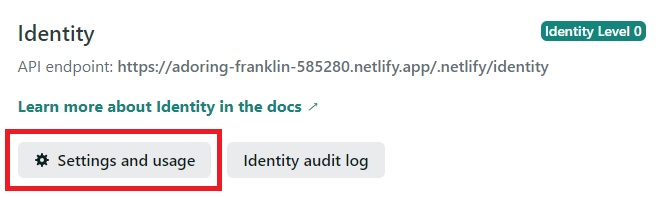
Click "Settings and usage"
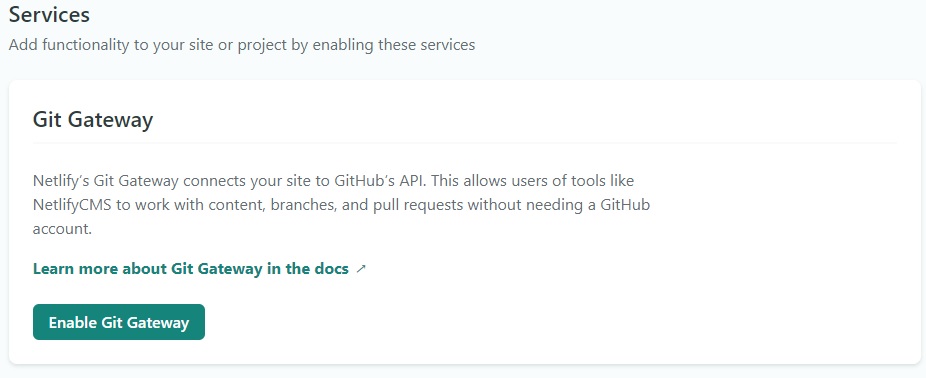
Then scroll down to Services/Git Gateway click "Enable Git Gateway"
Step 3 - Login Netlify CMS
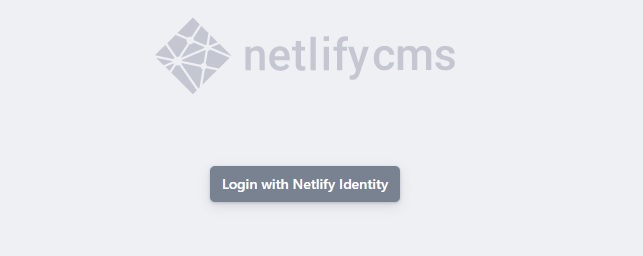
Now you are ready to login to Netify-CMS and start manage your content at
- https://***yournetlifydomain***/admin
- in my case it is https://adoring-franklin-585280.netlify.app/admin
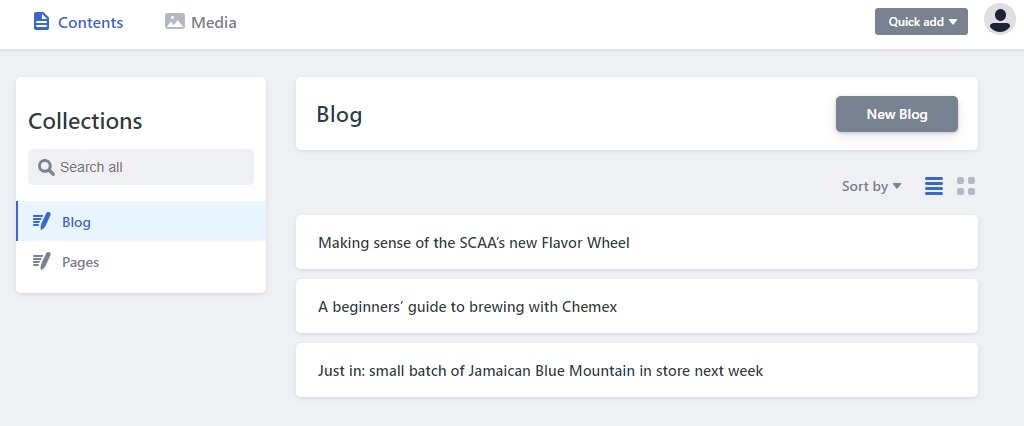
After login success, boom here it is and you are start managing your content now.
Summary
In this article, we have gone though how to setup/connect Netlify CMS to your blog site. My experience so far is quite simple and quick to setup. Most importantly is the whole setup is FREE.
One comment using Netlify-CMS is remember to "Publish" even if it's a working version and there's no "save" function. I have been failed to "Publish" this article once due to JWT expired and I have to rewrite it; so remember to "Publish" frequently so you won't step into this "hole"
Thanks for reading. Please drop me an email at povalab@gmail.com for any comment. I am very happy to hear any feedback from you.